
[ 화면 UI ]
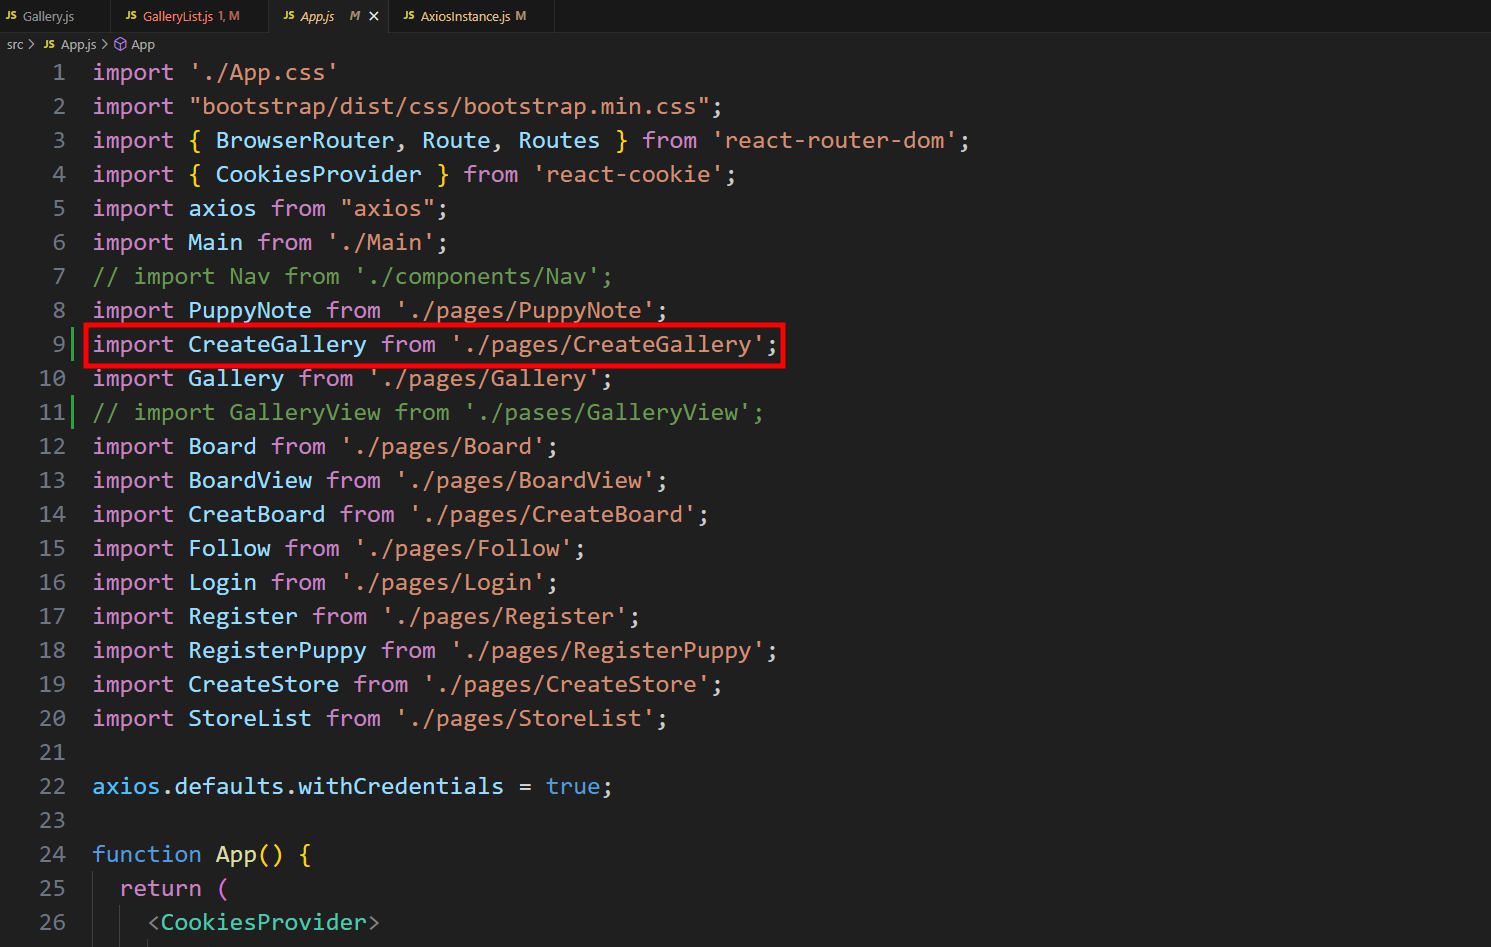
먼저 다른 페이지들처럼 React의 pases 폴더 안에 CreateGallery.js 라는 이름의 파일을 생성해주고
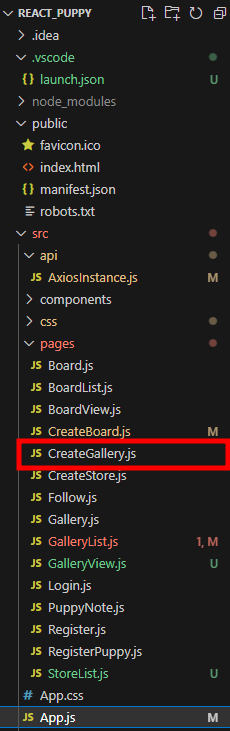
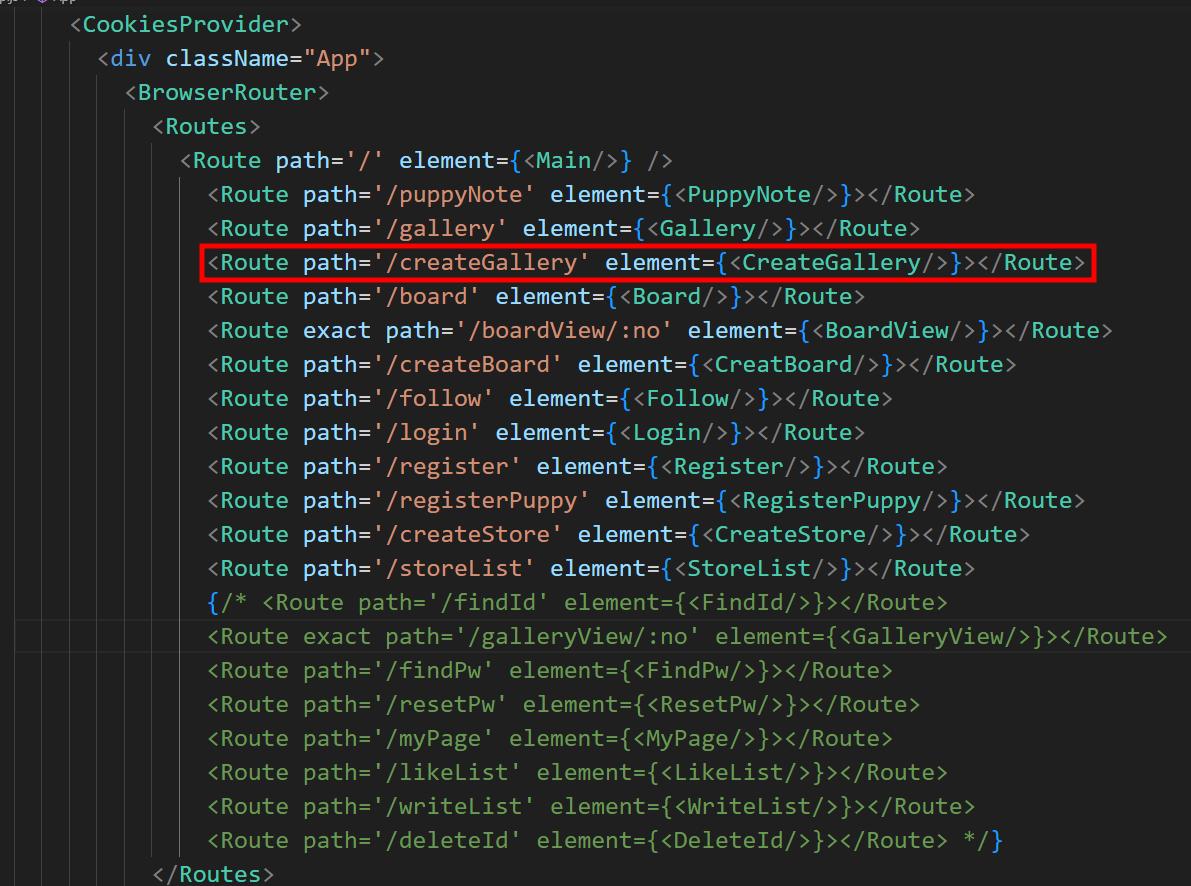
App.js에서 라우터에 등록해주었습니다.
💡 useState 훅 사용
useState Hook을 사용하여 컴포넌트의 상태를 관리하고
useCookies Hook을 사용하여 accessToken 쿠키 값을 가져와 cookies 상태 변수를 관리하기 위해서
import를 해줍니다.
import { useState } from "react";
import { useCookies } from "react-cookie";
accesstToken 쿠키 값을 가져오고,
업로드 할 파일 목록을 관리하기 위해 files 상태 변수를 작성해줬습니다.
초기 상태는 빈 배열로 설정됩니다.
    let [cookies, setCookies, removeCookies] = useCookies(['accessToken']); // 쿠키를 사용하기 위해 useCookies Hook을 사용하고, accessToken 쿠키를 가져옴
    let [files, setFiles] = useState([]); // 파일을 업로드하기 위한 상태 변수 files를 useState Hook을 사용하여 초기화
💡 uploadOnChange 함수
uploadOnChange 함수는 파일을 선택할 때 호출되며, 선택된 파일 목록을 상태 변수 files에 저장합니다.
입력된 파일 목록을 가져와서 Array.from() 메서드를 사용하여 배열로 변환한 다음, setFiles 함수를 사용하여 files 상태를 업데이트합니다. 이를 통해 업로드할 파일 목록을 상태에 저장합니다.
    let uploadOnChange = (e) => { // 파일 선택 시 호출되는 함수를 정의
        setFiles(Array.from(e.target.files)) // 선택된 파일 목록을 상태 변수 files에 저장
    }
💡 uploadFiles 함수
다음은 파일 업로드를 처리하는 uploadFiles 함수입니다.
선택된 파일들과 선택된 날짜를 FormData에 추가하고, axios를 사용하여 서버에 POST 요청을 보냅니다.
    const uploadFiles = (e) => { // 파일 업로드를 처리하는 함수를 정의합니다.
        e.preventDefault(); // 기본 이벤트 동작을 막습니다.

        // FormData 객체 생성: HTTP 요청에 첨부할 수 있는 키-값 쌍의 컬렉션
        const formData = new FormData();

        // FormData에 파일을 추가합니다.
        files.map((file) => {
          formData.append("file", file);
        });

        formData.append("date", selectedDate); // 선택된 날짜를 FormData에 추가합니다.

        // 이미지 업로드를 요청합니다.
        axios.post('http://localhost:8082/api/v1/auth/y/createGallery', formData, {
            headers: {
              'Content-Type': 'multipart/form-data', // 요청 헤더에 Content-Type을 설정합니다.
              'Authorization' : 'Bearer '+ cookies.accessToken // 요청 헤더에 Authorization을 설정하여 access token을 전송합니다.
            }
          })
          .then((res) => { // 요청이 성공한 경우
              console.log(res.data); // 응답 데이터를 콘솔에 출력합니다.
              alert("이미지 업로드 성공!"); // 성공 알림을 띄웁니다.
          }).catch((err) => { // 요청이 실패한 경우
              console.error(err); // 에러 메시지를 콘솔에 출력합니다.
              alert("이미지 업로드 실패"); // 실패 알림을 띄웁니다.
          });
    }
코드를 뜯어서 조금 더 자세히 기록해보겠습니다.
먼저 기본 이벤트 동작을 막아줍니다.
e.preventDefault();
💡 FormData
HTTP 요청에 첨부할 수 있는 키-값 쌍의 컬렉션
이미지 파일을 폼 제출을 사용해 서버에 업로드 하기 위해 FormData 객체를 사용합니다.
key 값과 value 쌍의 형태로 데이터 전송을 도와줍니다.
 	// FormData 객체 생성: HTTP 요청에 첨부할 수 있는 키-값 쌍의 컬렉션
        const formData = new FormData();
💡 append 메서드
files 배열의 각 요소에 대해 FormData 객체의 append 메서드를 사용하여 FormData에 여러 개의 파일을 추가합니다.
- files.map((file) => { ... }) 는 배열 files의 각 요소에 대해 콜백 함수를 실행합니다. 이때 각 요소를 file이라는 변수로 받아서 콜백 함수 내부에서 처리합니다.
- map을 사용하는 이유?
배열의 각 요소에 대해 동일한 작업을 반복적으로 수행하기 위해서입니다. 따라서 files 배열의 각 파일에 대해 FormData에 파일을 추가하기 위해 map을 사용합니다.
        // FormData에 파일을 추가합니다.
        files.map((file) => {
          formData.append("file", file);
        });
💡 axios
Axios를 사용하여 파일을 업로드하는 POST 요청
파일을 업로드할 때 multipart/form-data 형식을 사용합니다. ( Content-Type 헤더 )
액세스 토큰을 함께 전송하기 위해 accessToken 헤더에 쿠키의 액세스 토큰 값을 설정해줍니다.
      axios.post('http://localhost:8082/api/v1/auth/y/createGallery', formData, {
            headers: {
              'Content-Type': 'multipart/form-data', // 요청 헤더에 Content-Type을 설정합니다.
              'Authorization' : 'Bearer '+ cookies.accessToken // 요청 헤더에 Authorization을 설정하여 access token을 전송합니다.
            }
          })
          .then((res) => { // 요청이 성공한 경우
              console.log(res.data); // 응답 데이터를 콘솔에 출력합니다.
              alert("이미지 업로드 성공!"); // 성공 알림을 띄웁니다.
          }).catch((err) => { // 요청이 실패한 경우
              console.error(err); // 에러 메시지를 콘솔에 출력합니다.
              alert("이미지 업로드 실패"); // 실패 알림을 띄웁니다.
          });
    }
💡 return 문
    return (
        <>
        <div>
            <Nav2/>
        </div>
            <form>
                <h4><strong>사진첩 작성</strong></h4>
                <input type="file" accept="image/*" onChange={uploadOnChange}/>
                <button label="이미지 업로드" onClick={uploadFiles}>작성하기</button>
            </form>
        </>
        );
💡 CreateGallery 내보내기
export default CreateGallery;
[ Spring ]
💡 application.properties
스프링에서는 먼저, 파일 업로드를 가능하게 하기 위해 필요한 속성을 application.properties에 작성해줍니다.
추후 필요하면 수정할 생각입니다.
#파일 업로드 가능 여부
spring.servlet.multipart.enabled=true
#업로드된 파일의 임시 저장 경로
spring.servlet.multipart.location=C:/Users/xooxpeak/Desktop/갠프젝/Upload
#한 번에 최대 업로드 가능 용량
spring.servlet.multipart.max-request-size=50MB
#파일 하나의 최대 크기
spring.servlet.multipart.max-file-size=30MB
#업로드된 파일 저장
part.upload.path=C:/Users/xooxpeak/Desktop/갠프젝/Upload
💡 GalleryDTO
Entity는 이미 생성되어있다는 가정 하에 DTO를 살펴보겠습니다.
저 같은 경우엔 entity에 있는 id~gallExtension 외에
파일이름, 폴더이름, uuid을 쓰기 위해 세 가지를 더 추가해주었습니다.
package com.example.demo.dto;

import com.fasterxml.jackson.annotation.JsonProperty;
import lombok.*;

import java.sql.Date;

@Getter
@Setter
@Data
@AllArgsConstructor
@NoArgsConstructor
@Builder
public class GalleryDTO {

	private Long id;
	private Long noteId;
	private Date gallDate;
	private String gallImg;
	private String gallExtension;

	// 파일 업로드
	private String fileName;
	private String uuid;
	private String folderPath;

}
💡 GalleryService
클라이언트가 업로드한 파일이 각 파일별로 폴더를 생성하여 서버에 저장되는 소스입니다.
- createGallery
클라이언트가 업로드한 파일을 받아 처리하고, 갤러리에 대한 DTO를 반환합니다. 각 파일은 UUID를 이용하여 식별되며, 파일명, UUID, 폴더 경로 등의 정보가 갤러리 DTO에 저장됩니다. - makeFolder
업로드된 파일을 저장할 폴더를 생성하는 메서드 입니다. 저는 파일을 날짜별로 저장하는 로직으로 구현했습니다.
현재 날짜를 기준으로 폴더를 생성하고, 생성된 폴더의 경로를 반환합니다.
이 부분은 따로 기록을 할 생각입니다!
package com.example.demo.service;

import com.example.demo.dto.GalleryDTO;
import com.example.demo.entity.GalleryEntity;
import com.example.demo.mapper.GalleryMapper;
import com.example.demo.repository.GalleryRepository;
import lombok.extern.log4j.Log4j2;
import org.springframework.beans.factory.annotation.Autowired;
import org.springframework.beans.factory.annotation.Value;
import org.springframework.stereotype.Service;
import org.springframework.util.StringUtils;
import org.springframework.web.multipart.MultipartFile;

import java.io.File;
import java.io.IOException;
import java.nio.file.Path;
import java.nio.file.Paths;
import java.sql.Date;
import java.time.LocalDate;
import java.time.format.DateTimeFormatter;
import java.util.ArrayList;
import java.util.List;
import java.util.Objects;
import java.util.UUID;
import java.util.stream.Collectors;


@Service
@Log4j2
public class GalleryService {

	@Autowired
	private GalleryRepository galleryRepository;

	// 업로드 할 위치
	@Value("${part.upload.path}")
	private String uploadPath;

	// 사진첩 작성
	public List<GalleryDTO> createGallery(List<MultipartFile> uploadFiles) {
        List<GalleryDTO> galleryDTOList = new ArrayList<>();

        Path savePath=null;
        String fileExtension=null;

        for (MultipartFile uploadFile : uploadFiles) {
            // 이미지 파일만 업로드
            // TODO: 확장자를 빼오는 방법으로 수정
            if (!Objects.requireNonNull(uploadFile.getContentType()).startsWith("image")) {
                log.warn("this file is not an image type");
                continue;

            }

            // 파일명: 업로드 된 파일의 원래 파일 이름을 추출
            String originalName = uploadFile.getOriginalFilename();

            // 마지막으로 온 "/"부분으로부터 +1 해준 부분부터 출력
            // originalName이 "/path/to/file/example.txt"와 같은 문자열이라면, "example.txt" 부분만 (파일명만) 추출
            String fileName = originalName.substring(originalName.lastIndexOf("//") + 1);
            log.info("fileName: " + fileName);

			// 파일 확장자
            fileExtension = StringUtils.getFilenameExtension(originalName);

            // 날짜 폴더 생성
            String folderPath = makeFolder();

            // UUID
            String uuid = UUID.randomUUID().toString();

            // 저장할 파일 이름 중간에 "_"를 이용하여 구분
            String saveName = uploadPath + File.separator + folderPath + File.separator + uuid + "_" + fileName;

            // Paths.get() 메서드는 특정 경로의 파일 정보를 가져옵니다.(경로 정의하기)
            savePath = Paths.get(saveName);

            try {
                // transferTo(file) : uploadFile에 파일을 업로드 하는 메서드
                uploadFile.transferTo(savePath);
                galleryDTOList.add(new GalleryDTO(fileName, uuid, folderPath));
            } catch (IOException e) {
                e.printStackTrace();
            }
        }

        return galleryDTOList;
    }

	// 날짜 폴더 생성
	public String makeFolder() {
		//LocalDate를 문자열로 포멧
		String str = LocalDate.now().format(DateTimeFormatter.ofPattern("yyyy/MM/dd"));
		String folderPath = str.replace("/", File.separator);

		// make folder --------
		// File newFile= new File(dir,"파일명");
		// -> 부모 디렉토리를 파라미터로 인스턴스 생성
		File uploadPathFolder = new File(uploadPath, folderPath);

		// 만약 uploadPathFolder가 존재하지않는다면 makeDirectory하라는 의미
		// mkdir(): 디렉토리에 상위 디렉토리가 존재하지 않을경우에는 생성이 불가능한 함수
		// mkdirs(): 디렉토리의 상위 디렉토리가 존재하지 않을 경우에는 상위 디렉토리까지 모두 생성하는 함수
		if(!uploadPathFolder.exists()) {
			boolean mkdirs = uploadPathFolder.mkdirs();
			log.info("-------------------makeFolder------------------");
			log.info("uploadPathFolder.exists(): "+uploadPathFolder.exists());
			log.info("mkdirs: "+mkdirs);
		}

		return folderPath;

	}

}
💡 GalleryController
@RequestPart 라는 어노테이션을 몰라서 @RequestParam으로 적었다가 수정한 부분 입니다..ㅎㅎ
@RequestPart
SpringMVC 멀티파트 요청에서 파일 및 폼 데이터를 처리하는데 사용되는 어노테이션 입니다.
multipart/form-data 요청의 일부로 클라이언트에서 전송된 파일이나 다른 멀티파트 항목을 컨트롤러 메서드의 매개변수로 전달합니다.
클라이언트에서 "/createGallery" 경로로 POST 요청이 오면 이 메서드가 실행됩니다.
"file"이라는 이름의 멀티파트 파트에서 파일들을 받으며, 받은 파일들을 갤러리 서비스의 createGallery 메서드에 전달하여 처리하고, 결과를 반환합니다.
package com.example.demo.controller;

import com.example.demo.dto.GalleryDTO;
import com.example.demo.service.GalleryService;
import org.springframework.beans.factory.annotation.Autowired;
import org.springframework.web.bind.annotation.*;
import org.springframework.web.multipart.MultipartFile;

import java.util.List;

@RestController
@RequestMapping("/api/v1/auth/y")
public class GalleryController {

	@Autowired
	GalleryService galleryService;

	/**
	 * 기능 : 사진첩 작성  ( 훈련사 계정 )
	 * url : /createGallery
	 * request data : 날짜(글제목), 글 내용, 작성 날짜, 작성 시간
	 * response data : 사진첩 작성 성공
	 */
	@PostMapping("/createGallery")
	public List<GalleryDTO> createGallery(@RequestPart (value = "file", required = false) List<MultipartFile> uploadFiles) {
		return galleryService.createGallery(uploadFiles);
}'Project 댕린이집' 카테고리의 다른 글
| [사진첩] 업로드 파일(이미지) 미리보기 (0) | 2024.05.09 |
|---|---|
| [사진첩] 저장경로와 파일명 지정 (0) | 2024.05.08 |
| [Spring Security+JWT] HttpOnly방식을 이용한 refreshToken 발급 (0) | 2024.04.29 |
| [Spring Security+JWT] JWT는 어디에 저장해야할까? localStorage vs cookie (0) | 2024.04.16 |
| [로그인] 로그인 기능 구현 (0) | 2024.04.11 |
[ 화면 UI ]
먼저 다른 페이지들처럼 React의 pases 폴더 안에 CreateGallery.js 라는 이름의 파일을 생성해주고
App.js에서 라우터에 등록해주었습니다.
💡 useState 훅 사용
useState Hook을 사용하여 컴포넌트의 상태를 관리하고
useCookies Hook을 사용하여 accessToken 쿠키 값을 가져와 cookies 상태 변수를 관리하기 위해서
import를 해줍니다.
import { useState } from "react";
import { useCookies } from "react-cookie";
accesstToken 쿠키 값을 가져오고,
업로드 할 파일 목록을 관리하기 위해 files 상태 변수를 작성해줬습니다.
초기 상태는 빈 배열로 설정됩니다.
    let [cookies, setCookies, removeCookies] = useCookies(['accessToken']); // 쿠키를 사용하기 위해 useCookies Hook을 사용하고, accessToken 쿠키를 가져옴
    let [files, setFiles] = useState([]); // 파일을 업로드하기 위한 상태 변수 files를 useState Hook을 사용하여 초기화
💡 uploadOnChange 함수
uploadOnChange 함수는 파일을 선택할 때 호출되며, 선택된 파일 목록을 상태 변수 files에 저장합니다.
입력된 파일 목록을 가져와서 Array.from() 메서드를 사용하여 배열로 변환한 다음, setFiles 함수를 사용하여 files 상태를 업데이트합니다. 이를 통해 업로드할 파일 목록을 상태에 저장합니다.
    let uploadOnChange = (e) => { // 파일 선택 시 호출되는 함수를 정의
        setFiles(Array.from(e.target.files)) // 선택된 파일 목록을 상태 변수 files에 저장
    }
💡 uploadFiles 함수
다음은 파일 업로드를 처리하는 uploadFiles 함수입니다.
선택된 파일들과 선택된 날짜를 FormData에 추가하고, axios를 사용하여 서버에 POST 요청을 보냅니다.
    const uploadFiles = (e) => { // 파일 업로드를 처리하는 함수를 정의합니다.
        e.preventDefault(); // 기본 이벤트 동작을 막습니다.

        // FormData 객체 생성: HTTP 요청에 첨부할 수 있는 키-값 쌍의 컬렉션
        const formData = new FormData();

        // FormData에 파일을 추가합니다.
        files.map((file) => {
          formData.append("file", file);
        });

        formData.append("date", selectedDate); // 선택된 날짜를 FormData에 추가합니다.

        // 이미지 업로드를 요청합니다.
        axios.post('http://localhost:8082/api/v1/auth/y/createGallery', formData, {
            headers: {
              'Content-Type': 'multipart/form-data', // 요청 헤더에 Content-Type을 설정합니다.
              'Authorization' : 'Bearer '+ cookies.accessToken // 요청 헤더에 Authorization을 설정하여 access token을 전송합니다.
            }
          })
          .then((res) => { // 요청이 성공한 경우
              console.log(res.data); // 응답 데이터를 콘솔에 출력합니다.
              alert("이미지 업로드 성공!"); // 성공 알림을 띄웁니다.
          }).catch((err) => { // 요청이 실패한 경우
              console.error(err); // 에러 메시지를 콘솔에 출력합니다.
              alert("이미지 업로드 실패"); // 실패 알림을 띄웁니다.
          });
    }
코드를 뜯어서 조금 더 자세히 기록해보겠습니다.
먼저 기본 이벤트 동작을 막아줍니다.
e.preventDefault();
💡 FormData
HTTP 요청에 첨부할 수 있는 키-값 쌍의 컬렉션
이미지 파일을 폼 제출을 사용해 서버에 업로드 하기 위해 FormData 객체를 사용합니다.
key 값과 value 쌍의 형태로 데이터 전송을 도와줍니다.
 	// FormData 객체 생성: HTTP 요청에 첨부할 수 있는 키-값 쌍의 컬렉션
        const formData = new FormData();
💡 append 메서드
files 배열의 각 요소에 대해 FormData 객체의 append 메서드를 사용하여 FormData에 여러 개의 파일을 추가합니다.
- files.map((file) => { ... }) 는 배열 files의 각 요소에 대해 콜백 함수를 실행합니다. 이때 각 요소를 file이라는 변수로 받아서 콜백 함수 내부에서 처리합니다.
- map을 사용하는 이유?
배열의 각 요소에 대해 동일한 작업을 반복적으로 수행하기 위해서입니다. 따라서 files 배열의 각 파일에 대해 FormData에 파일을 추가하기 위해 map을 사용합니다.
        // FormData에 파일을 추가합니다.
        files.map((file) => {
          formData.append("file", file);
        });
💡 axios
Axios를 사용하여 파일을 업로드하는 POST 요청
파일을 업로드할 때 multipart/form-data 형식을 사용합니다. ( Content-Type 헤더 )
액세스 토큰을 함께 전송하기 위해 accessToken 헤더에 쿠키의 액세스 토큰 값을 설정해줍니다.
      axios.post('http://localhost:8082/api/v1/auth/y/createGallery', formData, {
            headers: {
              'Content-Type': 'multipart/form-data', // 요청 헤더에 Content-Type을 설정합니다.
              'Authorization' : 'Bearer '+ cookies.accessToken // 요청 헤더에 Authorization을 설정하여 access token을 전송합니다.
            }
          })
          .then((res) => { // 요청이 성공한 경우
              console.log(res.data); // 응답 데이터를 콘솔에 출력합니다.
              alert("이미지 업로드 성공!"); // 성공 알림을 띄웁니다.
          }).catch((err) => { // 요청이 실패한 경우
              console.error(err); // 에러 메시지를 콘솔에 출력합니다.
              alert("이미지 업로드 실패"); // 실패 알림을 띄웁니다.
          });
    }
💡 return 문
    return (
        <>
        <div>
            <Nav2/>
        </div>
            <form>
                <h4><strong>사진첩 작성</strong></h4>
                <input type="file" accept="image/*" onChange={uploadOnChange}/>
                <button label="이미지 업로드" onClick={uploadFiles}>작성하기</button>
            </form>
        </>
        );
💡 CreateGallery 내보내기
export default CreateGallery;
[ Spring ]
💡 application.properties
스프링에서는 먼저, 파일 업로드를 가능하게 하기 위해 필요한 속성을 application.properties에 작성해줍니다.
추후 필요하면 수정할 생각입니다.
#파일 업로드 가능 여부
spring.servlet.multipart.enabled=true
#업로드된 파일의 임시 저장 경로
spring.servlet.multipart.location=C:/Users/xooxpeak/Desktop/갠프젝/Upload
#한 번에 최대 업로드 가능 용량
spring.servlet.multipart.max-request-size=50MB
#파일 하나의 최대 크기
spring.servlet.multipart.max-file-size=30MB
#업로드된 파일 저장
part.upload.path=C:/Users/xooxpeak/Desktop/갠프젝/Upload
💡 GalleryDTO
Entity는 이미 생성되어있다는 가정 하에 DTO를 살펴보겠습니다.
저 같은 경우엔 entity에 있는 id~gallExtension 외에
파일이름, 폴더이름, uuid을 쓰기 위해 세 가지를 더 추가해주었습니다.
package com.example.demo.dto;

import com.fasterxml.jackson.annotation.JsonProperty;
import lombok.*;

import java.sql.Date;

@Getter
@Setter
@Data
@AllArgsConstructor
@NoArgsConstructor
@Builder
public class GalleryDTO {

	private Long id;
	private Long noteId;
	private Date gallDate;
	private String gallImg;
	private String gallExtension;

	// 파일 업로드
	private String fileName;
	private String uuid;
	private String folderPath;

}
💡 GalleryService
클라이언트가 업로드한 파일이 각 파일별로 폴더를 생성하여 서버에 저장되는 소스입니다.
- createGallery
클라이언트가 업로드한 파일을 받아 처리하고, 갤러리에 대한 DTO를 반환합니다. 각 파일은 UUID를 이용하여 식별되며, 파일명, UUID, 폴더 경로 등의 정보가 갤러리 DTO에 저장됩니다. - makeFolder
업로드된 파일을 저장할 폴더를 생성하는 메서드 입니다. 저는 파일을 날짜별로 저장하는 로직으로 구현했습니다.
현재 날짜를 기준으로 폴더를 생성하고, 생성된 폴더의 경로를 반환합니다.
이 부분은 따로 기록을 할 생각입니다!
package com.example.demo.service;

import com.example.demo.dto.GalleryDTO;
import com.example.demo.entity.GalleryEntity;
import com.example.demo.mapper.GalleryMapper;
import com.example.demo.repository.GalleryRepository;
import lombok.extern.log4j.Log4j2;
import org.springframework.beans.factory.annotation.Autowired;
import org.springframework.beans.factory.annotation.Value;
import org.springframework.stereotype.Service;
import org.springframework.util.StringUtils;
import org.springframework.web.multipart.MultipartFile;

import java.io.File;
import java.io.IOException;
import java.nio.file.Path;
import java.nio.file.Paths;
import java.sql.Date;
import java.time.LocalDate;
import java.time.format.DateTimeFormatter;
import java.util.ArrayList;
import java.util.List;
import java.util.Objects;
import java.util.UUID;
import java.util.stream.Collectors;


@Service
@Log4j2
public class GalleryService {

	@Autowired
	private GalleryRepository galleryRepository;

	// 업로드 할 위치
	@Value("${part.upload.path}")
	private String uploadPath;

	// 사진첩 작성
	public List<GalleryDTO> createGallery(List<MultipartFile> uploadFiles) {
        List<GalleryDTO> galleryDTOList = new ArrayList<>();

        Path savePath=null;
        String fileExtension=null;

        for (MultipartFile uploadFile : uploadFiles) {
            // 이미지 파일만 업로드
            // TODO: 확장자를 빼오는 방법으로 수정
            if (!Objects.requireNonNull(uploadFile.getContentType()).startsWith("image")) {
                log.warn("this file is not an image type");
                continue;

            }

            // 파일명: 업로드 된 파일의 원래 파일 이름을 추출
            String originalName = uploadFile.getOriginalFilename();

            // 마지막으로 온 "/"부분으로부터 +1 해준 부분부터 출력
            // originalName이 "/path/to/file/example.txt"와 같은 문자열이라면, "example.txt" 부분만 (파일명만) 추출
            String fileName = originalName.substring(originalName.lastIndexOf("//") + 1);
            log.info("fileName: " + fileName);

			// 파일 확장자
            fileExtension = StringUtils.getFilenameExtension(originalName);

            // 날짜 폴더 생성
            String folderPath = makeFolder();

            // UUID
            String uuid = UUID.randomUUID().toString();

            // 저장할 파일 이름 중간에 "_"를 이용하여 구분
            String saveName = uploadPath + File.separator + folderPath + File.separator + uuid + "_" + fileName;

            // Paths.get() 메서드는 특정 경로의 파일 정보를 가져옵니다.(경로 정의하기)
            savePath = Paths.get(saveName);

            try {
                // transferTo(file) : uploadFile에 파일을 업로드 하는 메서드
                uploadFile.transferTo(savePath);
                galleryDTOList.add(new GalleryDTO(fileName, uuid, folderPath));
            } catch (IOException e) {
                e.printStackTrace();
            }
        }

        return galleryDTOList;
    }

	// 날짜 폴더 생성
	public String makeFolder() {
		//LocalDate를 문자열로 포멧
		String str = LocalDate.now().format(DateTimeFormatter.ofPattern("yyyy/MM/dd"));
		String folderPath = str.replace("/", File.separator);

		// make folder --------
		// File newFile= new File(dir,"파일명");
		// -> 부모 디렉토리를 파라미터로 인스턴스 생성
		File uploadPathFolder = new File(uploadPath, folderPath);

		// 만약 uploadPathFolder가 존재하지않는다면 makeDirectory하라는 의미
		// mkdir(): 디렉토리에 상위 디렉토리가 존재하지 않을경우에는 생성이 불가능한 함수
		// mkdirs(): 디렉토리의 상위 디렉토리가 존재하지 않을 경우에는 상위 디렉토리까지 모두 생성하는 함수
		if(!uploadPathFolder.exists()) {
			boolean mkdirs = uploadPathFolder.mkdirs();
			log.info("-------------------makeFolder------------------");
			log.info("uploadPathFolder.exists(): "+uploadPathFolder.exists());
			log.info("mkdirs: "+mkdirs);
		}

		return folderPath;

	}

}
💡 GalleryController
@RequestPart 라는 어노테이션을 몰라서 @RequestParam으로 적었다가 수정한 부분 입니다..ㅎㅎ
@RequestPart
SpringMVC 멀티파트 요청에서 파일 및 폼 데이터를 처리하는데 사용되는 어노테이션 입니다.
multipart/form-data 요청의 일부로 클라이언트에서 전송된 파일이나 다른 멀티파트 항목을 컨트롤러 메서드의 매개변수로 전달합니다.
클라이언트에서 "/createGallery" 경로로 POST 요청이 오면 이 메서드가 실행됩니다.
"file"이라는 이름의 멀티파트 파트에서 파일들을 받으며, 받은 파일들을 갤러리 서비스의 createGallery 메서드에 전달하여 처리하고, 결과를 반환합니다.
package com.example.demo.controller;

import com.example.demo.dto.GalleryDTO;
import com.example.demo.service.GalleryService;
import org.springframework.beans.factory.annotation.Autowired;
import org.springframework.web.bind.annotation.*;
import org.springframework.web.multipart.MultipartFile;

import java.util.List;

@RestController
@RequestMapping("/api/v1/auth/y")
public class GalleryController {

	@Autowired
	GalleryService galleryService;

	/**
	 * 기능 : 사진첩 작성  ( 훈련사 계정 )
	 * url : /createGallery
	 * request data : 날짜(글제목), 글 내용, 작성 날짜, 작성 시간
	 * response data : 사진첩 작성 성공
	 */
	@PostMapping("/createGallery")
	public List<GalleryDTO> createGallery(@RequestPart (value = "file", required = false) List<MultipartFile> uploadFiles) {
		return galleryService.createGallery(uploadFiles);
}'Project 댕린이집' 카테고리의 다른 글
| [사진첩] 업로드 파일(이미지) 미리보기 (0) | 2024.05.09 |
|---|---|
| [사진첩] 저장경로와 파일명 지정 (0) | 2024.05.08 |
| [Spring Security+JWT] HttpOnly방식을 이용한 refreshToken 발급 (0) | 2024.04.29 |
| [Spring Security+JWT] JWT는 어디에 저장해야할까? localStorage vs cookie (0) | 2024.04.16 |
| [로그인] 로그인 기능 구현 (0) | 2024.04.11 |